3D Laser Engraving Guide: Steps, Settings, and Customer Case Study
 24-06-26
WHAT ARE YOU LOOKING FOR?
Search Across Products, Blog Posts, Support Content, And Resources.

3D Laser Engraving Guide: Steps, Settings, and Customer Case Study
24-06-26

Achieving high-quality 3D laser engraving requires attention to detail at every stage, from selecting the right image to fine-tuning the engraving parameters. Image quality, material preparation, laser focus, and post-engraving cleaning all contribute to the depth, clarity, and final appearance of the engraved piece.
In this guide, we’ll explain what 3D laser engraving is, walk through a practical workflow, and share a customer case study from Tom Murray, who used a Thunder Laser Nova machine to create detailed 3D engraving results.
3D laser engraving is an advanced engraving technique that uses a laser beam to carve detailed, three-dimensional images or patterns into suitable materials. Unlike traditional engraving, which often creates shallow surface marks, 3D laser engraving adds visible depth, texture, and a sculpted effect.
This method can create multi-layered designs that look more realistic and dimensional. It is especially useful for decorative artwork, personalized gifts, detailed relief-style images, and creative wood engraving projects.
See how a laser machine can create 3D effects on wood.
To achieve a clean 3D engraving result, the workflow should be planned carefully. Each step, from image selection to post-processing, affects the final texture and detail.
Follow a practical workflow for 3D laser engraving.
Start by choosing a 3D image suitable for engraving. You can search for images through Google or other image resources, but the image should have enough contrast, depth information, and detail to produce a clear engraving result.
Before importing the file, make sure the image format is compatible with your laser engraving software and machine workflow.
After selecting the image, import it into LightBurn and configure the engraving parameters for your Thunder Laser machine. Pay special attention to the number of engraving passes. For shallow engraving depths, 3 passes are often enough as a starting point.
Once the parameters are adjusted, send the design data to the laser engraver and prepare for the engraving process.
Place the material inside the laser engraving machine and make sure it is properly aligned. Adjust the table height and focus carefully for better precision. Correct focus is especially important for 3D engraving because depth and detail depend on consistent laser performance.
After setup, close the machine cover, select the design file from the control panel, and start the engraving process. The laser head will move across the material and remove material with high accuracy to create the 3D effect.
If you are engraving wood, cleaning may be necessary after engraving to remove residue, smoke marks, or debris. Once cleaned, the final piece should show more defined depth, clearer texture, and a more polished 3D appearance.
Tip: Always test your settings on a sample material first. Even small changes in power, speed, DPI, or image processing can noticeably affect 3D engraving results.
This 3D laser engraving case was shared by Thunder Laser customer Tom Murray. The following process reflects the method he used to achieve the 3D engraving result he wanted. While it may not be the most efficient workflow for every user, it worked well for his project and can provide a useful starting point for others.
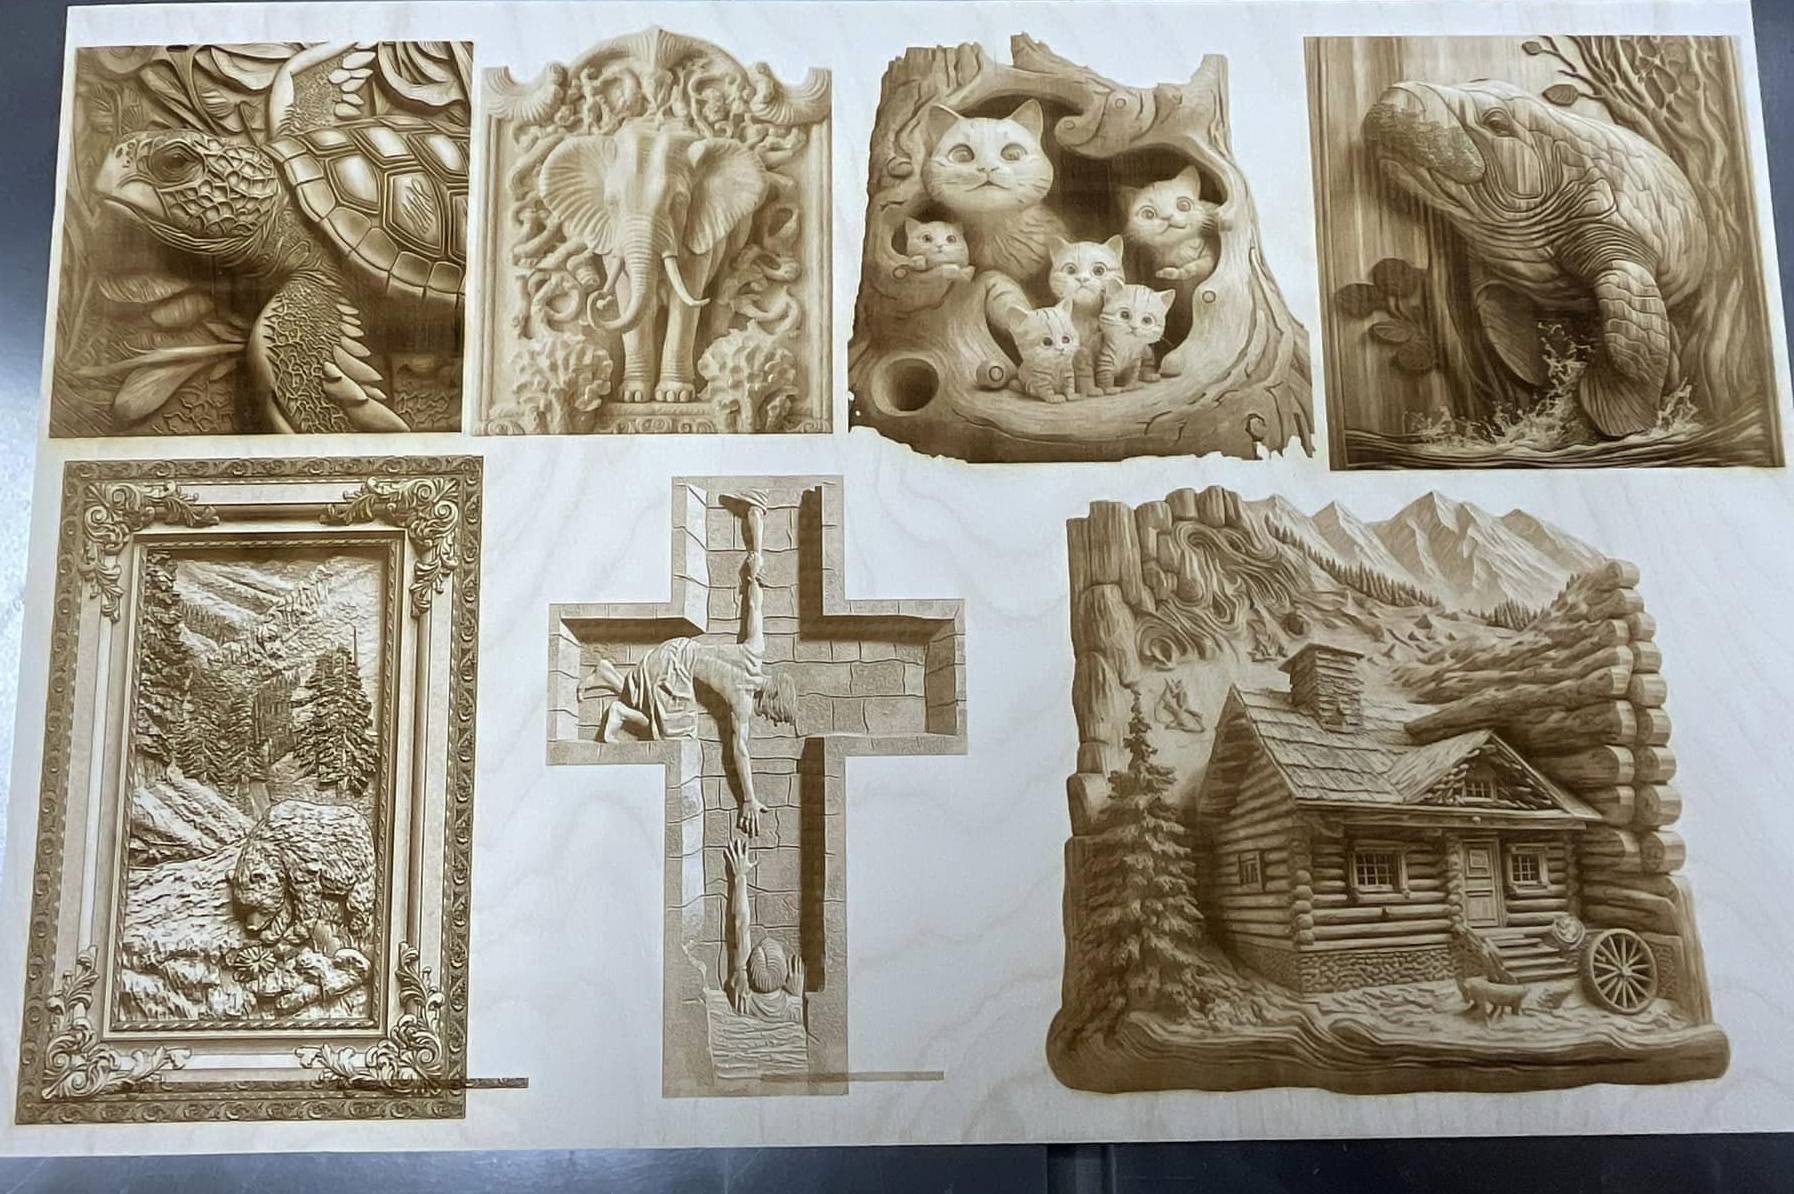
The following settings were used for the finished 3D engraving image in this customer example.
| Parameter | Setting |
|---|---|
| Model | Nova 24 60W |
| Power | Max 37.5%, Min 15% |
| Speed | 195 mm/sec |
| DPI | 318 |
| Scan Angle | 0 degrees |
| Laser Head Size | 1.5″ |
For dithering, Tom used the Jarvis algorithm for all images except the bear image, which used a threshold setting. Before engraving, it is important to double-check the image processing settings because they can strongly affect the depth and tonal transitions of the final engraving.
Tom adjusted the power and speed settings across all seven images. He paid extra attention to three images, especially the lighter ones, because they required more fine-tuning to achieve the desired result.
His process involved trial and error. He adjusted the power first, then adjusted the speed to refine the final engraving effect.
This case shows that 3D laser engraving often requires testing and adjustment. A single universal setting does not work for every image or material. Instead, power, speed, DPI, dithering method, and image contrast should be adjusted according to the desired visual result.
3D laser engraving opens up many creative possibilities, from detailed patterns to personalized gifts and decorative artwork. By choosing the right image, preparing the material carefully, and refining the laser settings, you can create results with impressive depth and visual impact.
Whether you are engraving wood, acrylic, or another suitable material, the key is to test, adjust, and learn from each result. With the right Thunder Laser machine and a thoughtful workflow, 3D engraving can become a powerful technique for creative and professional projects.
Ready to Start Your 3D Engraving Project?
Contact Thunder Laser to find the right laser engraving machine for 3D images, wood engraving, personalized gifts, and creative production.
Contact UsTalk To Our Experts Now!
Please leave your contact information so that we can serve you better.
3D LASER ENGRAVING FAQS
TAKE THE NEXT STEP WITH THUNDER LASER

 Stable & Consistent MachinesUnlimited ApplicationRobust After-sales SupportFactory Direct Supply