Let’s craft a laser cutting 3D acrylic heart! This sweet and thoughtful design adds a touch of elegance and warmth to any setting—perfect as a heartfelt gift for your partner, your mom, or anyone special.
Keep reading and enjoy a creative laser cutting time filled with love and style!
Verify the lens is clean or there's no problem in the laser.
Make sure the exhaust fan is working well.
Ensure the air assist is on.
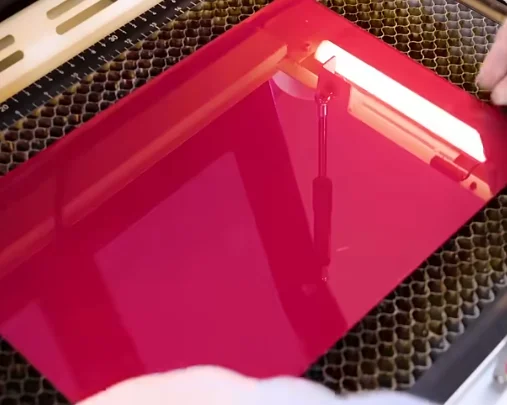
Step 1: Place Your Acrylic for Laser Cutting
Choose a red acrylic board on the laser honeycomb bed. You can also change to any colour you like!
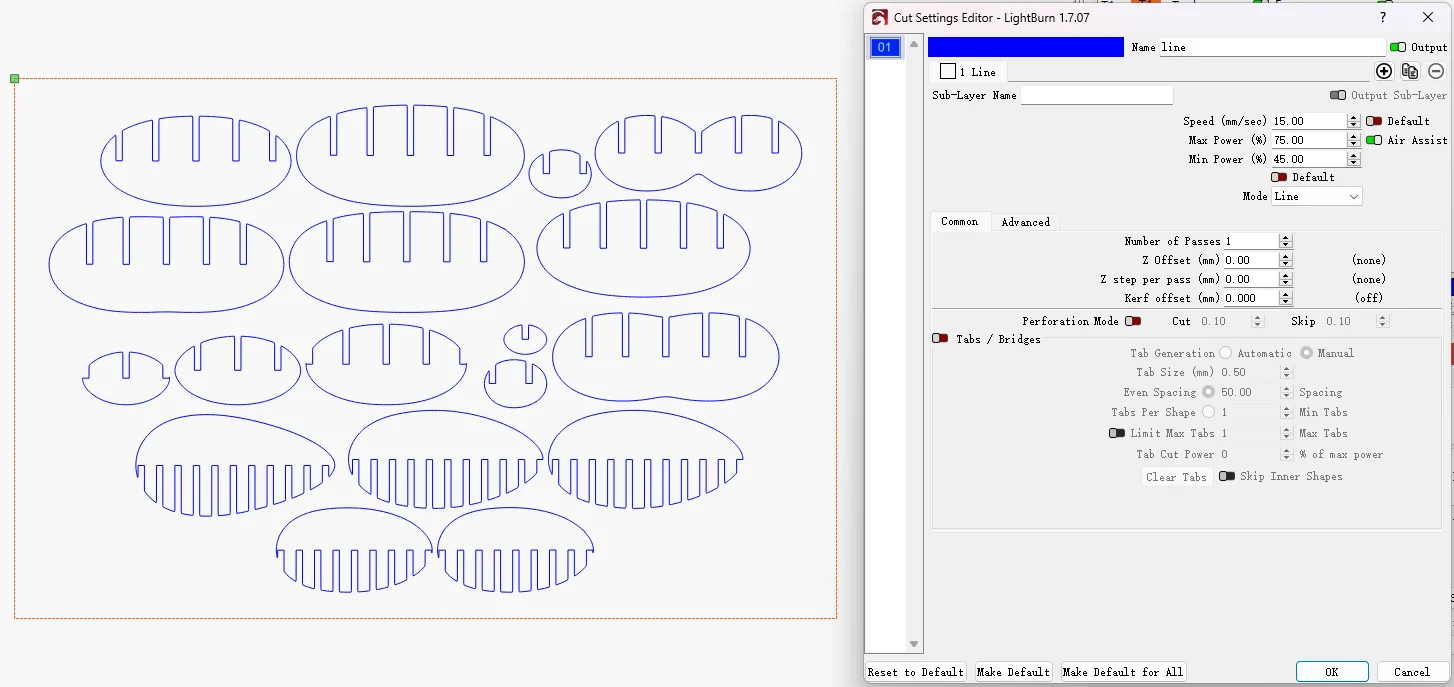
Step 2: Open the 3D Acrylic Heart File and Check the Laser Cutting Settings
Import the 3D heart design in LightBurn and check if your acrylic size is large enough.
For laser cutting 3D heart with a lot of elements, ensure there are no misalignments or unnecessary overlaps in the file. Double-check everything, and decide if you want to add or subtract elements according to your preferences.
Ensure that the parameters are set correctly:
If the min power is too low, the cutting corners will not cut through; if the min power is too high, the laser cutting will be bad at the corners.
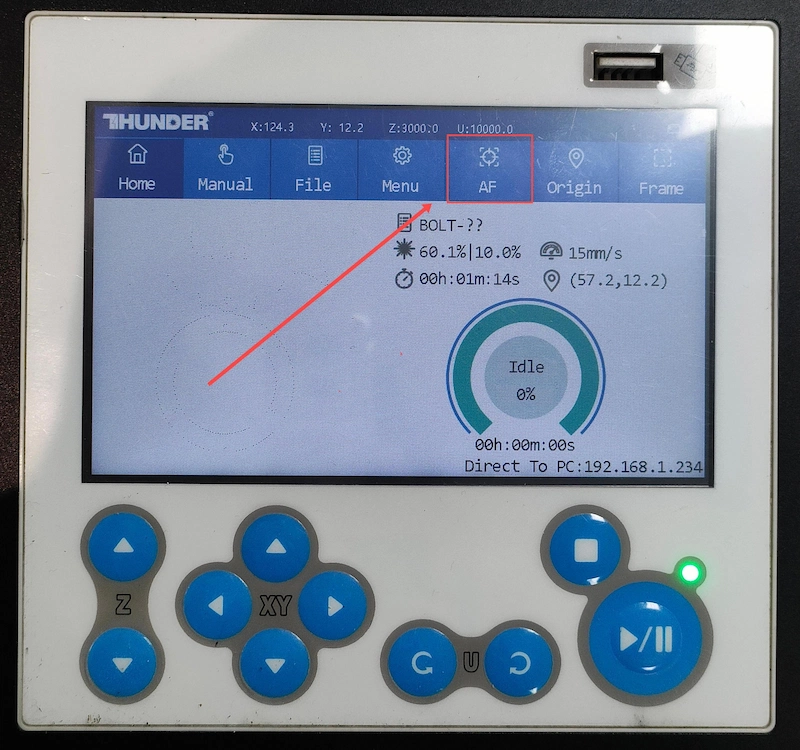
Step 3: Focus on the Acrylic
Without focusing, your outcomes may fall short of expectations. So before starting, make sure you’ve rightly focused.
For focusing, you have two options: Auto Focus, which is simple—just press the AF button on the Thunder Bolt screen. Then you’re ready to have a laser cutting.
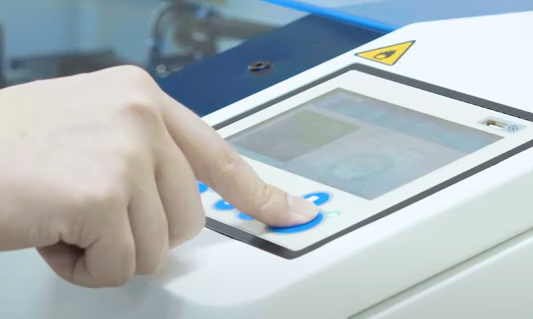
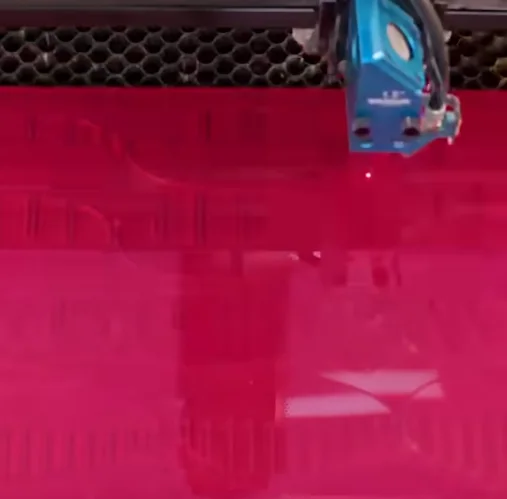
Step 4: Frame the Design and Start and Cutting
When you click “Frame”, the red light will display the laser cutting area. This is a safe process, and the frame will align with the acrylic. Once aligned, simply press “Start” to begin the 3D heart laser cutting with the Thunder Bolt!
Step 5: Monitor the Laser Cutting Process
To avoid any issues, carefully monitor the laser cutting, especially when unusual conditions like alarms arise.
Considering the laser cutting energy, for safety reasons, we advise against staring directly at the process, even with the laser door closed.
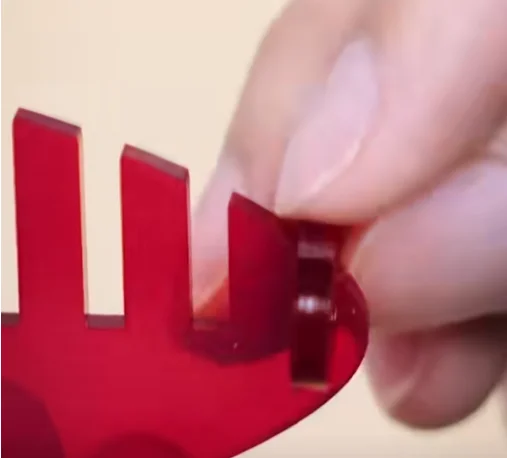
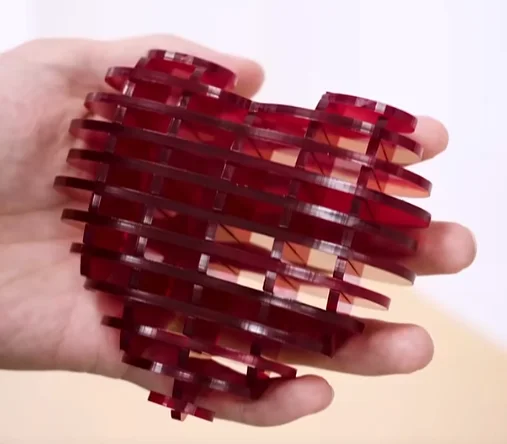
Step 6: Assemble the 3D Red Acrylic Heart
When the acrylic laser cutting is completed, it’s time to get the parts out. Then it’s just a fun assembly time to get the ideal 3D heart. Imagine the joy of assembling it, as each piece clicks into place to create a warm, layered gift.
Come and Try!
Laser cutting on acrylic heart designs brings dimension, clarity, and a touch of love to every piece. Whether you’re creating a thoughtful gift for a partner, a heartfelt token for Mom, or a stylish decor accent, these 3D acrylic hearts are a beautiful way to express emotion with precision and flair.
Want to turn your feelings into something lasting and meaningful? Laser cutting makes it easy to share love in a form that truly shines.
.png "laser cutter Globle") International
International
 United States
 Brasil
 Canada
 Costa Rica
 Mexico
 Česká
Česká
 Romania
 Polska
 Ireland
 Italia
 Lietuva
 Россия
 Deutschland
 Britain
 Україна
 France
 Sverige
 Norway
 Denmark
 Ελλάδα
 Portugal
 한국
한국
 中国
中国
 中国香港
中国香港
 Israel
 中國臺灣
中國臺灣
 ジャパン
ジャパン India
India
 پاکستان
 پශ්රී ලංකා
 ประเทศไทย
 Australia
 New Zealand
 South Africa