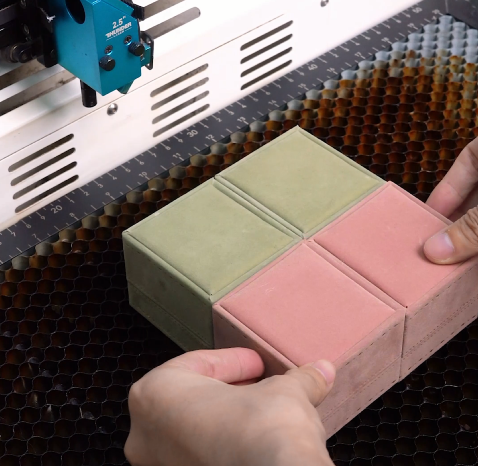
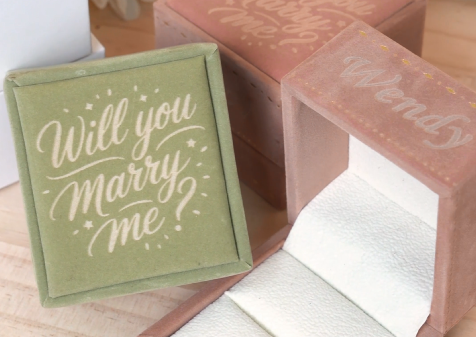
With Valentine’s Day coming up, many people start thinking about small details that can make a moment feel more thoughtful and personal. A ring box may seem simple, but it’s often part of a memory that lasts much longer than the day itself.
In this tutorial, you’ll learn how to laser engrave a flannel ring box with custom text or subtle patterns. The process is gentle and precise, designed to work with soft materials while preserving their texture. It’s a small project, but one that adds meaning to a very special occasion.
Verify the lens is clean or there's no problem in the laser.
Make sure the exhaust fan is working well.
Ensure the air assist is on.
Step 1: Place the Ring Box on the Laser Bed
Place the flannel ring box flat on the laser bed with the engraving area facing up. Make sure the box is stable and won’t move during engraving. If needed, use a soft fixture to gently hold it in place without compressing the fabric.
Tips:
There are three common types of pins: T-shaped, L-shaped, and F-shaped. A special use for F-shaped pins is clamping up the plywood to prevent burn marks. Be mindful of the height of the magnets and pins. If they are too tall, the sensor might hit them and become damaged during processing.
3 common types of pins
F-shaped pin usage
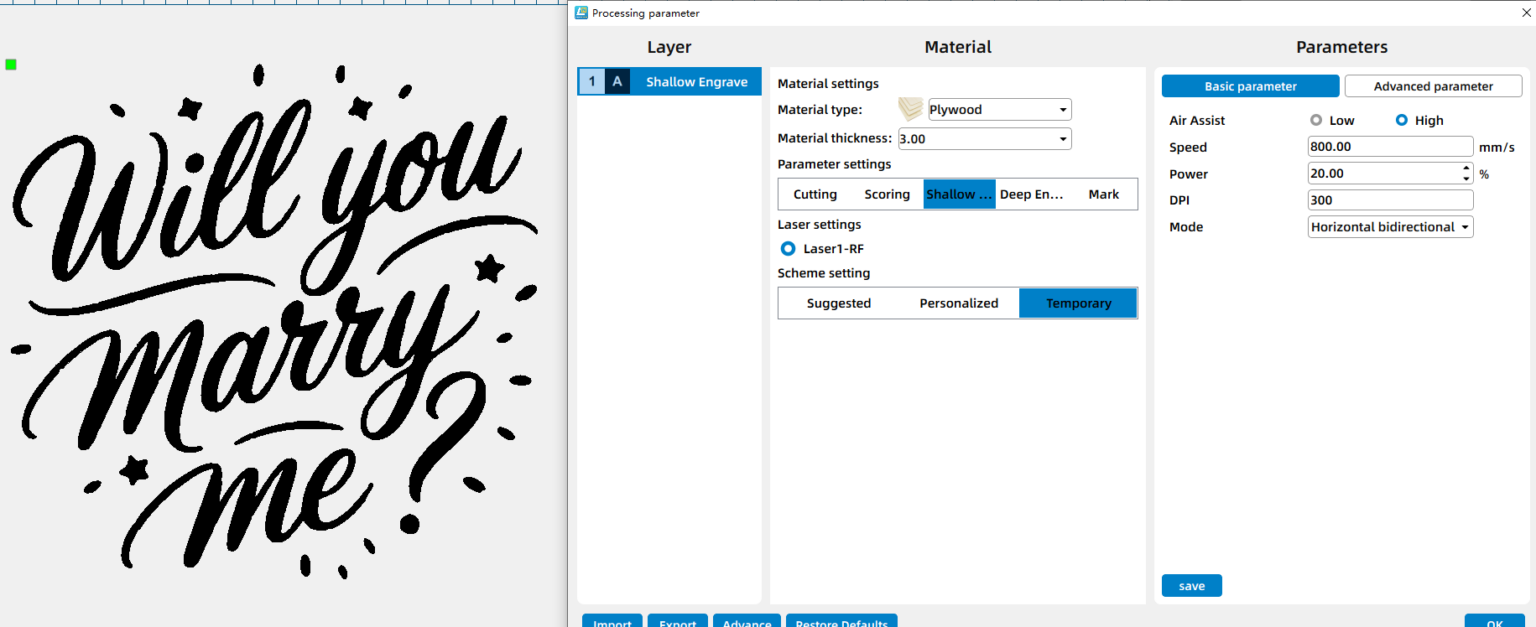
Step 2: Open the File and Check the Settings
Open your laser software (such as LaserMaker or LightBurn) and import your engraving design. Adjust the size and position so it fits naturally on the lid of the ring box. Keep the design simple and well-spaced for best results on soft materials.
Step 3: Focus Your Laser Machine
Auto-focus the laser. Proper focus helps achieve clean, consistent marks.
Auto focus
Manual focus
Step 4: Frame the Design and Start Laser Engraving
Use the border or frame function to preview the engraving area. This helps confirm that the design is correctly aligned on each box before engraving begins.
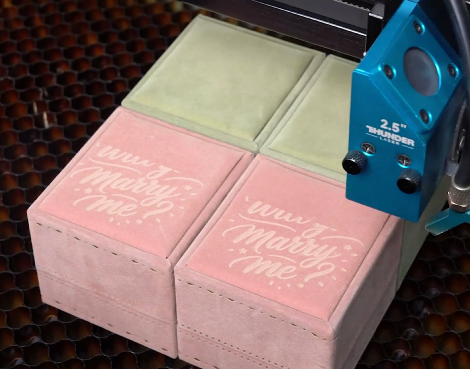
Step 5: Monitor the Laser Engraving Process
Start the engraving and closely monitor the process. Watch for even marking and make sure the laser interaction remains gentle to preserve the texture of the flannel surface.
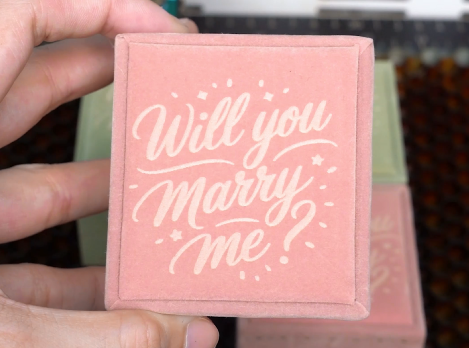
Step 7: Complete the Task
Once engraving is finished, carefully remove the ring box from the laser bed. Lightly brush or wipe away any residue, and your custom flannel ring box is ready to use or gift.
Come and Try!
Valentine’s Day doesn’t have to be complicated. Sometimes, a quiet detail speaks the loudest. Try engraving a name, a date, or a short message that only the two of you understand. With just a few steps, you can turn a simple flannel ring box into something personal—ready for a moment that matters.


.png "laser cutter Globle") International
International
 United States
 Brasil
 Canada
 Costa Rica
 Mexico
 Česká
Česká
 Romania
 Polska
 Ireland
 Italia
 Lietuva
 Россия
 Deutschland
 Britain
 Україна
 France
 Sverige
 Norway
 Denmark
 Ελλάδα
 Portugal
 한국
한국
 中国
中国
 中国香港
中国香港
 Israel
 中國臺灣
中國臺灣
 ジャパン
ジャパン India
India
 پاکستان
 پශ්රී ලංකා
 ประเทศไทย
 Australia
 New Zealand
 South Africa