Laser Cutting-Perpetual Calendar

5月 17, 2024

Introduction

Want to own a truly customized calendar? Try our unique perpetual calendar design! Simply laser engrave the days of the week, months, and dates, then hang the circular date and month discs onto the protruding pegs to easily display the current day.

Unlike fixed calendars made for a single year, this perpetual version allows infinite reuse. No need to discard it when a new month or year rolls around. The customizability and sustainability make this an eco-friendly organizational accessory. Come and try it now!

Machine Used

Bolt Pro 22 30W

Material Needed

  • A piece of wood plank
  • A tube of glue

Settings

  • Engraving Speed: 1500mm/s
  • Engraving Power: 30%
  • Cutting Speed: 15mm/s
  • Cutting Power: 70%
  • Hatch Type: bidirectional
  • DPI:500DPI

Before your work begins

Step 1: Place the Materials

Lay your wooden board flat on the laser bed. Make sure it’s clean, free of dust, and secured so it won’t shift during engraving.

put the wood

Step 2: Import the Design File and Check the Settings

Open your preferred laser software (eg, Lasermaker or Lightburn) and import your design file. Adjust the size and positioning to match your materials. Double-check which elements are set for engraving and which are set for cutting.

laser cutting perpetual calender settings

Step 3: Focus Your Laser Machine

Proper focusing is essential for achieving detailed engravings. If your machine supports auto focus, a single click will set the correct distance. If you prefer manual focus, use the focus stick to adjust the laser head until it just touches the surface of the mirror at a perfect vertical angle. Spending an extra moment on accurate focusing will pay off with professional-looking results.

auto focus

Step 4: Frame the Design and Start Laser Engraving

Use the framing (Border) function to check the engraving area. This helps confirm that the design is positioned correctly and won’t exceed the material boundaries.

Frame your design

Step 5: Monitor the Laser Engraving Process

Stay near the machine while it’s running and watch the cutting and engraving progress. Keep an eye out for excessive smoke, small flame-ups, or any movement of the material that could affect the outcome. Make sure your workspace is well-ventilated, and rely on air assist if available.

laser cutting perpetual calender 1

Step 6: Bond the Pieces together

Once the engraving is complete, remove the pieces from the laser bed. Use wood glue to attach them securely and let the glue dry completely.

laser cutting perpetual calender 4

Step 7: Completion

Your wooden perpetual calendar is now finished! Adjust the blocks or markers, set the date, and enjoy a reusable, elegant calendar for your desk or shelf.

laser engraved perpetual calendar made with thunder bolt

Come and Try!

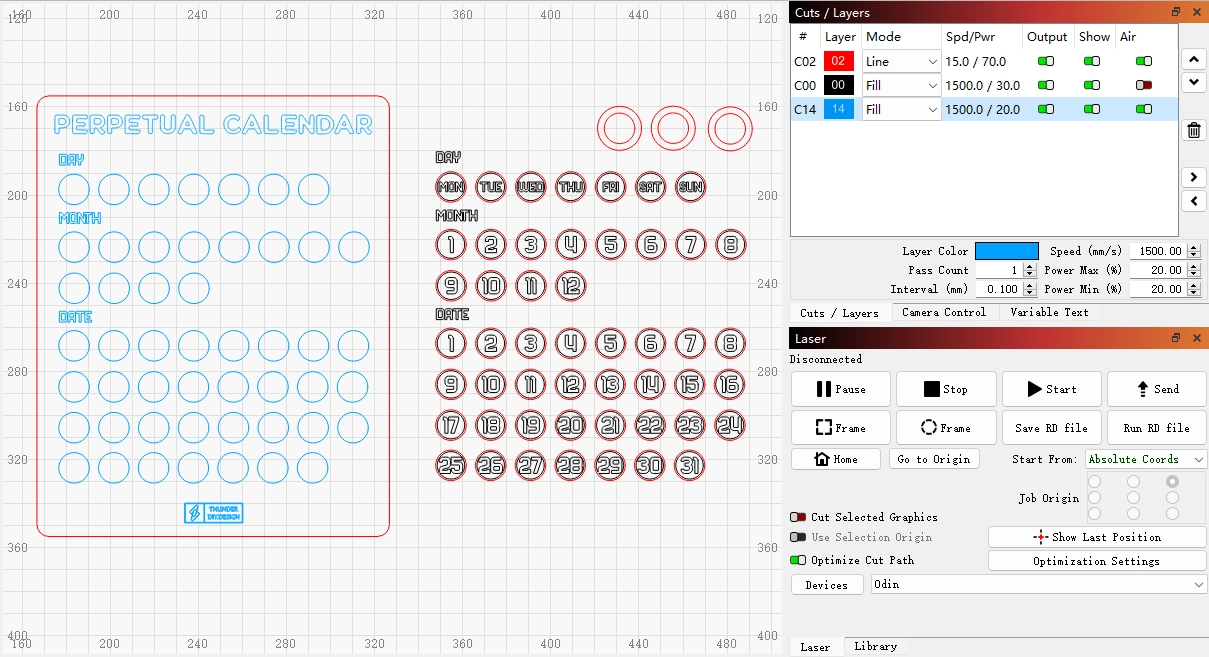
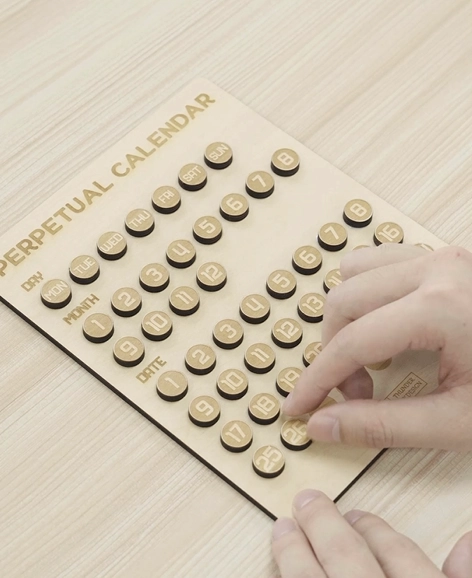
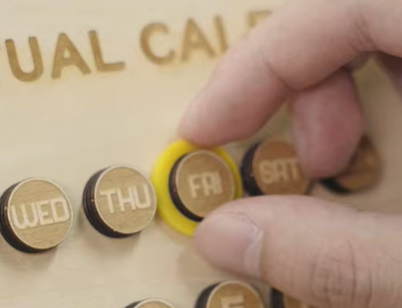
Let this handcrafted, reusable calendar be the functional art piece anchoring your organizational habits! Craft a perpetual calendar and embrace the eco-friendly flexibility of this custom laser-etched creation. Date by distinctive date, celebrate your sustainability style!
Thrive with THUNDER LASER Now

    ————————
    Download popup form

    America

    Europe

    Aisa

    Oceanica

    Africa