A guitar pick may be small, but it’s one of the most personal tools a guitarist uses. The texture, material, and even the markings on it can make playing feel more connected and expressive.
In this tutorial, you’ll learn how to laser engrave wooden guitar picks with custom designs, logos, or text. The process is simple and precise, making it easy to add a personal touch without affecting the pick’s shape or playability. Whether you’re customizing picks for yourself or creating something meaningful to share, this project is a great place to start.
Verify the lens is clean or there's no problem in the laser.
Make sure the exhaust fan is working well.
Ensure the air assist is on.
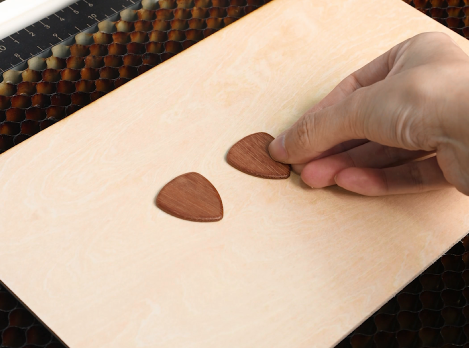
Step 1: Place the Guitar Picks on the Laser Bed
Place the wooden guitar picks flat on the laser bed. Make sure they are positioned securely and won’t shift during engraving. If needed, use a light fixture or jig to keep the picks in place.
Tips:
There are three common types of pins: T-shaped, L-shaped, and F-shaped. A special use for F-shaped pins is clamping up the plywood to prevent burn marks. Be mindful of the height of the magnets and pins. If they are too tall, the sensor might hit them and become damaged during processing.
3 common types of pins
F-shaped pin usage
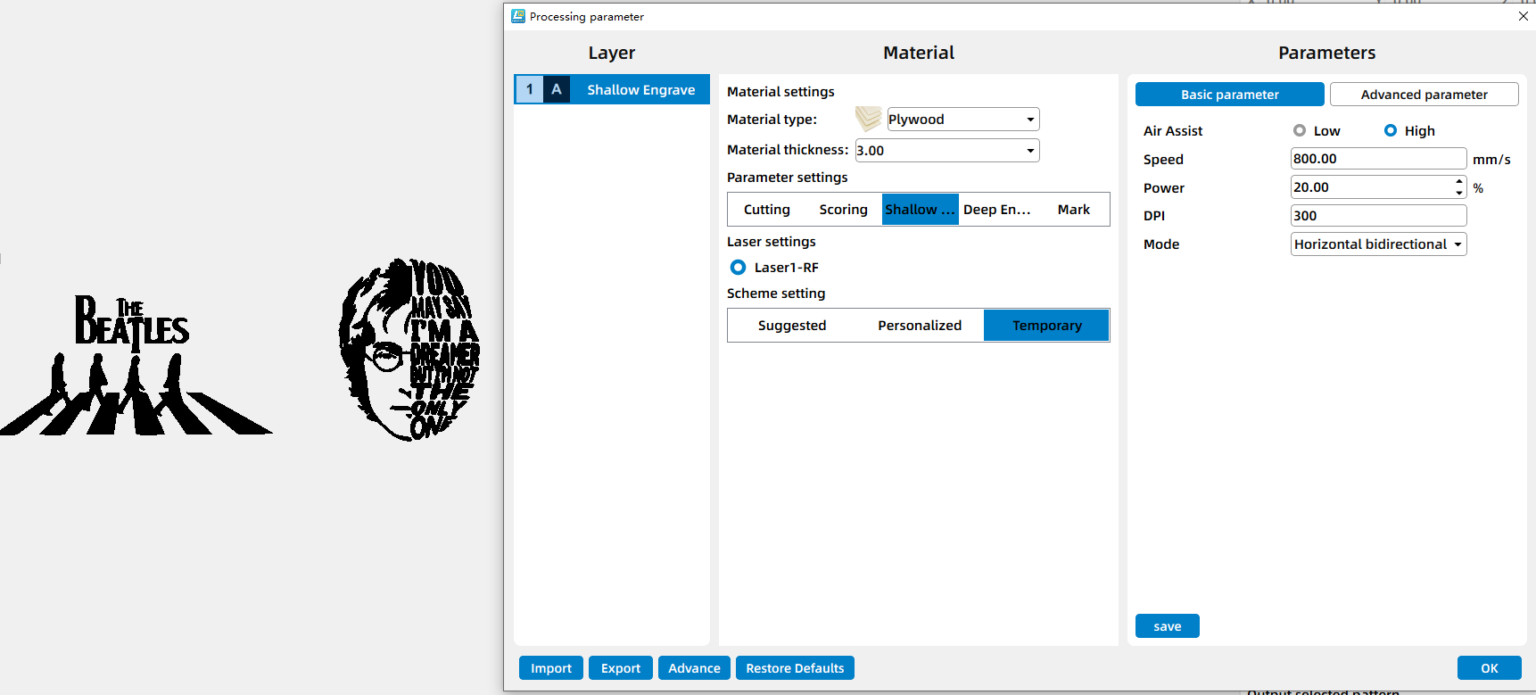
Step 2: Open the File and Check the Settings
Open your laser software (I use LaserMaker) and import your engraving file. Adjust the size and positioning so the design fits well within the surface of each guitar pick. Before starting, double-check your engraving parameters to ensure clean and readable results.
Step 3: Focus Your Laser Machine
Focus the laser to the surface of the wooden guitar picks. Accurate focus is important for achieving sharp details and consistent engraving depth on small items like picks.
Auto focus
Manual focus
Step 4: Frame the Design and Start Laser Engraving
Use the border or frame function to preview the engraving area. This helps confirm that the design is correctly aligned on each pick before engraving begins.
Step 5: Monitor the Laser Engraving Process
Stay close to the machine while it’s running and watch the engraving progress. Keep an eye out for excessive smoke, small flame-ups, or any movement of the material that could affect the outcome. Make sure your workspace is well-ventilated.
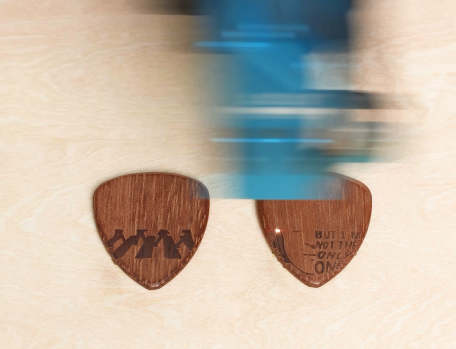
Step 6: Clean Off Residue
Once engraving is complete, remove the guitar picks from the laser bed. Gently wipe away any dust or residue using a soft cloth or tissue to reveal the engraved details clearly.
Step 7: Complete the Task
Your laser-engraved wooden guitar picks are now finished. Check the engraving quality, feel the surface, and they’re ready to be played or displayed.
Come and Try!
Pick one up and start playing. You’ll notice how a small, engraved detail can make something familiar feel new again. Try experimenting with different fonts, symbols, or textures—and see how laser engraving can turn everyday music accessories into something uniquely yours.


.png "laser cutter Globle") International
International
 United States
 Brasil
 Canada
 Costa Rica
 Mexico
 Česká
Česká
 Romania
 Polska
 Ireland
 Italia
 Lietuva
 Россия
 Deutschland
 Britain
 Україна
 France
 Sverige
 Norway
 Denmark
 Ελλάδα
 Portugal
 한국
한국
 中国
中国
 中国香港
中国香港
 Israel
 中國臺灣
中國臺灣
 ジャパン
ジャパン India
India
 پاکستان
 پශ්රී ලංකා
 ประเทศไทย
 Australia
 New Zealand
 South Africa