There’s something timeless about a handcrafted wooden box—especially when intricate patterns bring it to life. With a laser cutter, you can turn an ordinary piece of wood into an elegant keepsake box that’s both functional and artistic. Whether you’re making it as a personal storage piece or a thoughtful handmade gift, this project combines craftsmanship with creativity. Let’s dive in and see how you can make your own beautifully detailed wooden box with your Thunder Laser machine.
Verify the lens is clean or there's no problem in the laser.
Make sure the exhaust fan is working well.
Ensure the air assist is on.
Step 1: Place the Wood on the Laser Bed
Lay your wooden sheet flat on the honeycomb worktable. Ensure it’s well-aligned and firmly secured to prevent any movement during cutting.
Tips:
There are three common types of pins: T-shaped, L-shaped, and F-shaped. A special use for F-shaped pins is clamping up the plywood to prevent burn marks. Be mindful of the height of the magnets and pins. If they are too tall, the sensor might hit them and become damaged during processing.
3 common types of pins
F-shaped pin usage
Sensor hits a too high pin
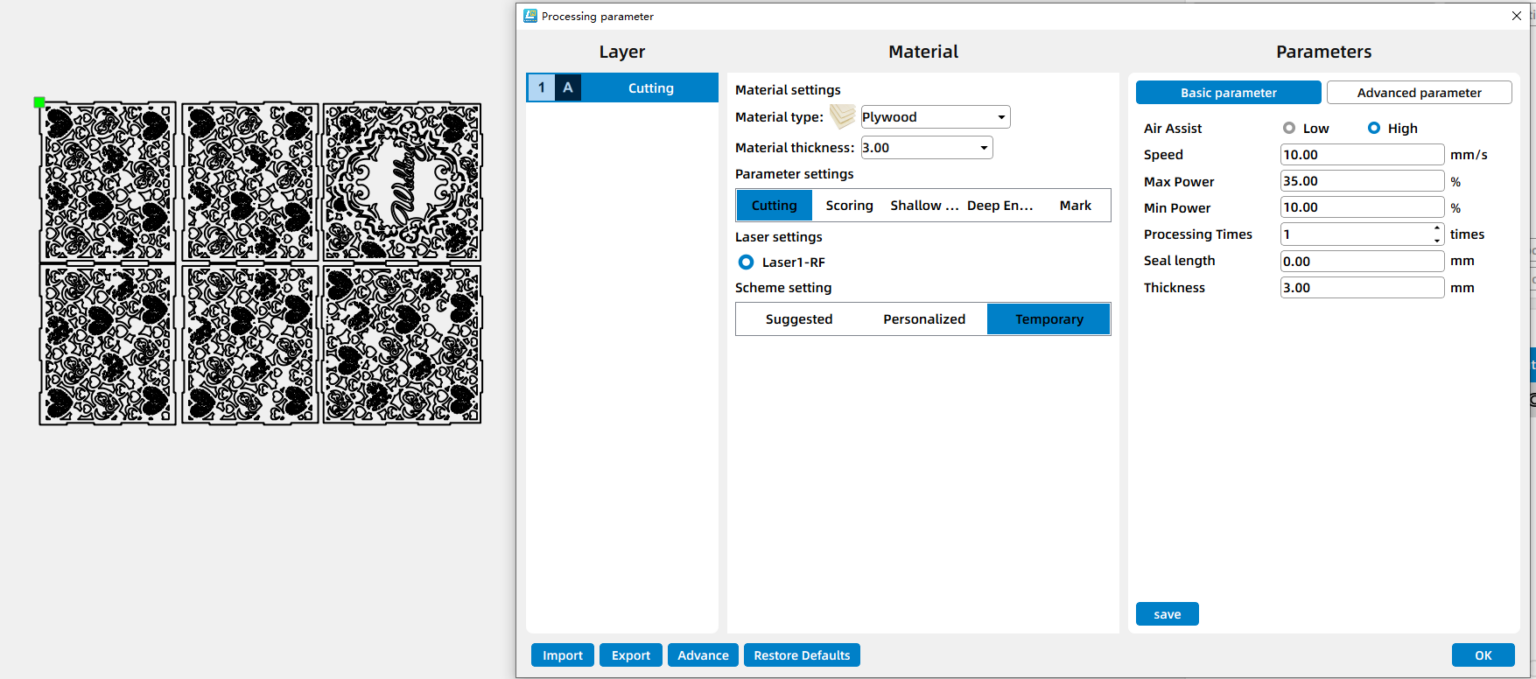
Step 2: Open the File and Check the Settings
Open your design in LightBurn, LaserMaker, or your controller. Assign colors/layers for engraving vs cutting. Scale the design to the final physical dimensions. Double-check everything, and decide if you want to add or subtract elements according to your preferences. For the laser cutting layers, pay extra attention to the power setting.
Step 3: Focus Your Laser Machine
Proper focusing ensures neat, polished edges. If your machine has auto focus, use it for quick setup. For manual focusing, lower the laser head with the focus stick until it touches the wood surface at a perfect angle. Always double-check before cutting.
Auto focus
Manual focus
Step 4: Frame the Design and Start Laser Cutting
Then click “Frame” or “Border” to preview your cutting area and make sure the design fits nicely on your board. This confirms your material placement and avoids wasting wood. Adjust as necessary. Once everything is set, start the laser job.
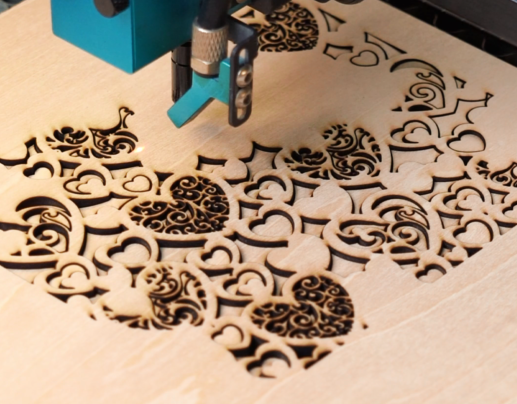
Step 5: Monitor the Laser Cutting Process
Stay close to the machine while it’s running and watch the cutting and engraving progress. Keep an eye out for excessive smoke, small flame-ups, or any movement of the material that could affect the outcome. Make sure your workspace is well-ventilated, and rely on air assist if available to achieve cleaner edges on the wood.
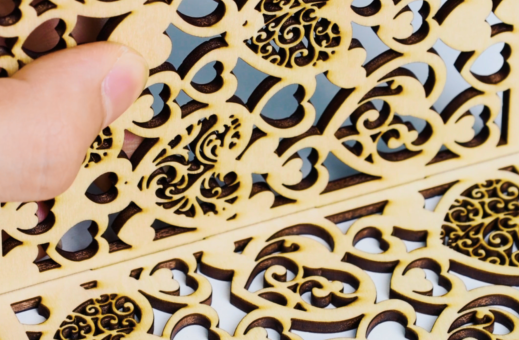
Step 6: Assemble the Box
When the cutting is done, remove all pieces carefully and start assembling. Each part should fit snugly into its slot — no glue needed! The interlocking design ensures a solid and durable build.
Come and Try!
And that’s it! You’ve built a personalized, perfectly fitted box using just your laser machine and a few sheets of material.


.png "laser cutter Globle") International
International
 United States
 Brasil
 Canada
 Costa Rica
 Mexico
 Česká
Česká
 Romania
 Polska
 Ireland
 Italia
 Lietuva
 Россия
 Deutschland
 Britain
 Україна
 France
 Sverige
 Norway
 Denmark
 Ελλάδα
 Portugal
 한국
한국
 中国
中国
 中国香港
中国香港
 Israel
 中國臺灣
中國臺灣
 ジャパン
ジャパン India
India
 پاکستان
 پශ්රී ලංකා
 ประเทศไทย
 Australia
 New Zealand
 South Africa