Learn How to process the picture with us! Pro tips available!
Step 1: Choose a Laser-Engraving-Friendly Image
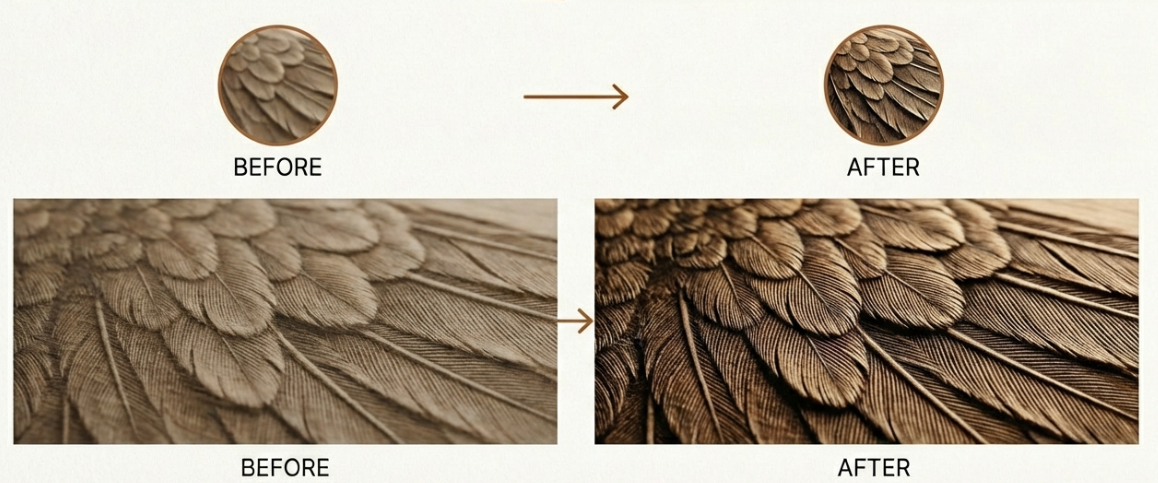
The workflow begins with selecting an image that is suitable for laser engraving. Not all photos translate well into engraved results. Images with clear subjects, strong contrast, and minimal background noise typically produce the best outcomes, making image selection a critical first step!
Step 2: Evaluate and Prepare the Image
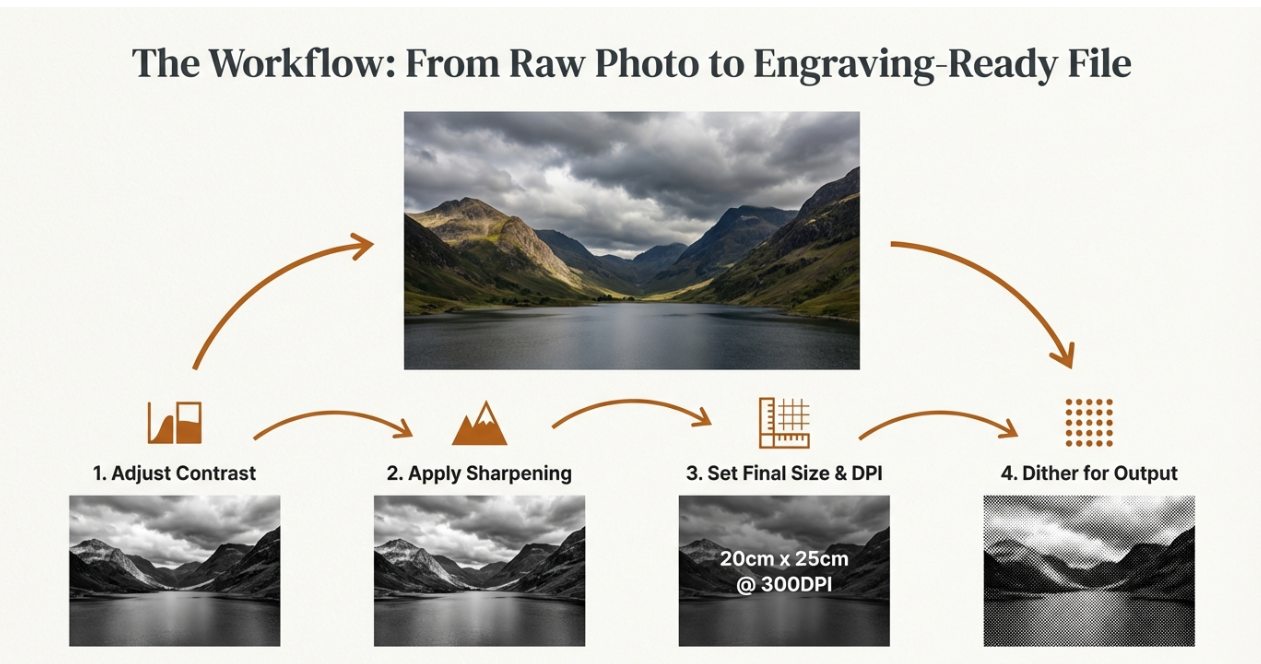
Once the image is selected, assess whether it can be engraved directly or requires further processing. In most cases, even high-quality images need adjustments—such as contrast enhancement, background cleanup, or grayscale conversion—to ensure the engraved result meets professional quality standards.
Step 3: Resizing the Object
After the initial evaluation, resize the image to fit the exact dimensions of your project. Accurate scaling within the design software ensures the artwork aligns properly with the material size and the laser’s working area, avoiding distortion or misalignment during engraving.
Step 4: Refining Design Curves
To achieve clean and continuous laser paths, refine the design by closing open curves and correcting broken outlines. Proper curve closure prevents unwanted gaps, incomplete engraving, or interruptions during the laser operation, especially when vector paths are involved.
Step 5: Adjust Processing Based on Material Type
Image processing must be adapted to the material being engraved. For example, when working with a dual-color board, engraving settings and image contrast should be optimized to expose the underlying layer cleanly. Different materials may require specific dithering methods, contrast levels, or engraving depths to achieve the desired visual effect.
Step 6: Combine Engraving and Cutting into a Single Job
The final step is to integrate both engraving and cutting instructions into one file. This allows the laser to engrave the image and cut the final shape in a single, continuous operation, ensuring precise alignment between the engraved artwork and its outer contour. Also, don’t forget to set the right dpi for your engraving!
If you want to know more about photo engraving, check here!
.png "laser cutter Globle") International
International
 United States
 Brasil
 Canada
 Costa Rica
 Mexico
 Česká
Česká
 Romania
 Polska
 Ireland
 Italia
 Lietuva
 Россия
 Deutschland
 Britain
 Україна
 France
 Sverige
 Norway
 Denmark
 Ελλάδα
 Portugal
 한국
한국
 中国
中国
 中国香港
中国香港
 Israel
 中國臺灣
中國臺灣
 ジャパン
ジャパン India
India
 پاکستان
 پශ්රී ලංකා
 ประเทศไทย
 Australia
 New Zealand
 South Africa